Are you looking to slim down your website? It’s time to consider WordPress image optimization! Today I’m going to walk you through a free plugin that will automatically perform image compression and serve all our photos in the WebP format. Best of all? It’s free! Settle in with a coffee, and let’s get your site running faster than ever before.

DISCLAIMER: I have no affiliate deals or financial relationship with any of the following companies, and I’m recommending them of my own volition. None of these suggestions have been sponsored.
WordPress Image Compression
First things first, let’s get all our WordPress image optimization taken care of and compressed to save on overhead for our users. The easiest way I have found to take care of both these steps at once is to use the Imagify WordPress plugin. When the plugin is installed, it can be configured under the “Settings” option in the admin panel.
Once you’ve found the Imagify settings, it’s time to look at the first set of options:
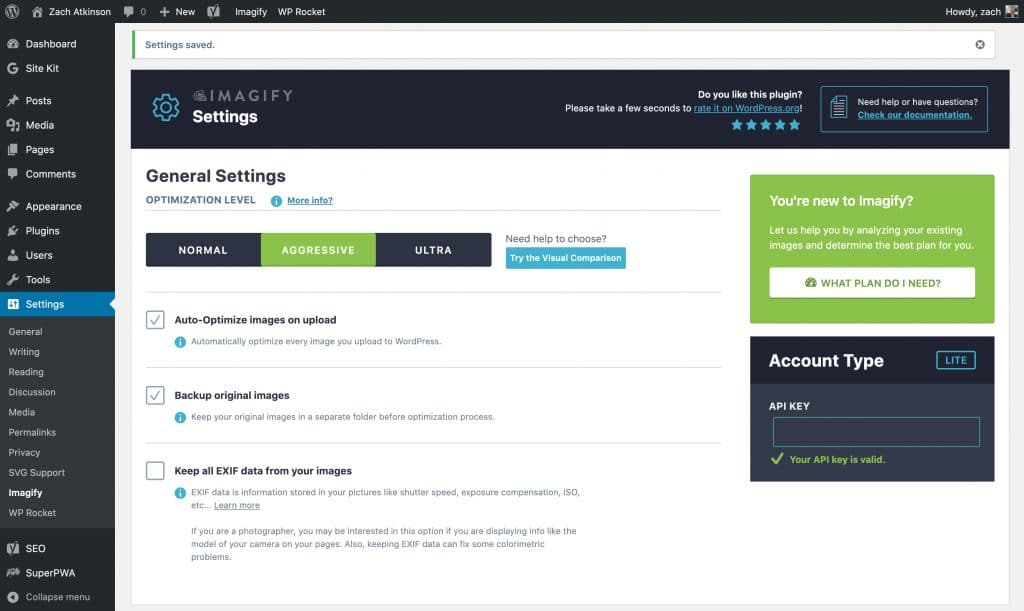
WordPress Image Optimization General Settings
Optimization Level
The backbone of the Imagify plugin is its ability to compress your images. You can click “Try the visual comparison” to get a real-time idea of each optimization level. For most sites, I find aggressive will do the trick, but if you can get away with Ultra, more power to you!
Auto Optimize on Upload
Make sure you tick this option so moving forward all image optimizations will be automated as soon as you upload media to your website.
Backup Original Images
Backup original images allow you to re-process your media files in case you chose the wrong optimization level. Say, for instance, you select ultra but find your photos coming out too blurry. Once you have nailed down the proper optimization level for your site, you can safely turn this off, but make sure you’re committed to your optimization level. If the backup original images option is turned off, you cannot re-process any pictures.
Keep All EXIF Data for Your Images
Unless you’re a photographer, you can probably safely disable the EXIF information for your pictures. This metadata includes things like GPS coordinates, camera model, date of the photo, and more. Removing the EXIF data leads to a leaner image file.

WebP Optimization
Create WebP Versions of Images
Serving your images in WebP format can drastically reduce the size of your images. Make sure you turn this option on! You’ll notice an immediate speed boost when using WebP.
Display Images in WebP Format on this Site
Since we just went to all the trouble of creating our images in WebP, we may as well serve them to our users! Enable this checkbox and select the “Use <picture> tags” radio button.
Media Library
Resize Larger Images
To save space, make sure you’re resizing larger images to the same size as your largest image size. By default this is 2048px. Read the small text info box to ensure this is the number you want. Your theme may have larger sizes that need to be accommodated.
Custom Folders
We need to add our theme directory to the custom folders area. Once added, Imagify will process any images specific to your theme.
Save Changes and Go To Bulk Optimizer
With all our settings in place, save your changes, and head over to the bulk optimizer. Select the “Imagify em’ all” option and sit back while Imagify compresses and translates your images to WebP!
Imagify also integrates well with my favourite caching program, WP Rocket!